I originally thought we'd do something with curly willow or manzanita branches, and what was used at the front of the church for the altar would then be moved to be centerpieces for the tables at the reception. (we were using the same venue for both.) For the smaller square glass vases, the idea was to fill them with cream roses.
Then, I made a million trips to Hobby Lobby, Michael's, and JoAnn's to explore items they might have. I knew I would need to purchase some glass cylinder vases, but I also had a friend (who was incredibly organized and a tremendous help as my wedding planner) who already owned many of the glass vase cylinders and the square low vases that we would use for centerpieces for the tables. I also did online research for the hanging votives. There were so many great ones, but the cost began to add up. This is the basic idea:
These were $6.99 and $4.99 each, which is pretty much an average for what you can purchase online (new)...
However, the need for a bargain drove me to explore. Michael's was the winner in this category. I bought "fishbowl" glassware for $.99/each. (Remember to use your store coupons for craft store purchases--they add up at Michael's as each receipt gives you a discount on your next purchase, and they regularly release coupons in the sale papers!)
After the glass was purchased, we had to figure out how to create the hangers for them. I married the handiest man ever, so he figured it all out and made them all--using a 16 gauge black coated wire from the automotive department at Wal-Mart. CHEAP! Then I bought ribbon at Hobby Lobby when it was on sale (best ribbon prices I've found when they run the 50% off sales). These are pics of my wedding votive holders, courtesy of Amber Beckham photography:

This was the front of the church, altar decor:
We rented candelabras from this place in Nashville, along with the cake stand. The centerpiece was made with the calla lilies that were shipped in from here. WARNING: there was drama with this shipment. Apparently flowers can get delayed in customs...just sitting at an airport somewhere wilting away in a box. I got an email notification the day before I was expecting my flowers (Thursday prior to the wedding) that they were scheduled to arrive several days AFTER my wedding. We went through hours of phone calls, speaking very calmly but sternly to people in Ecuador who couldn't understand what we were saying, and put the heat on for them to get my flowers to me! My fiance drove to the shipping place to pick them up when they finally arrived locally on Friday.
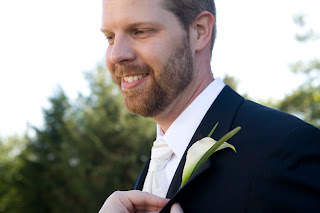
Since we didn't know whether these calla lilies would actually arrive, we quickly reserved some for my bouquet (so we would AT LEAST have enough for that) from Import Flowers, which is also where all of the roses (for centerpieces, corsages and bridesmaids bouquets) were ordered from, and the mini-callas to use for Jonathan's boutonniere. We went back there to get the filler touches for the corsages and boutonnieres, as well as some of the centerpieces. I loved Import and would highly recommend them. The callas for my bouquet were stunning! They also have great prices for the roses (almost the same price as Fresh Market) and the quality is great. With Fresh Market they wouldn't guarantee the color of the roses...they might be cream, they might come in red. Excuse me??? Ummm, no. It's worth just a little bit more to know I'm getting the color I want.
We did use the squares with roses for some of the tables, and the round cylinders with tall roses and curly willow for the remainder of the tables. (We ordered curly willow online for the table centerpieces because it was much less expensive, but it came in not-so-curly...you win some, you don't win some. :)
For the front of the church we ended up deciding to go with one dramatic floral centerpiece on the table, surrounded by great mixed-height candles as opposed to a line of the centerpieces. The tall glass cylinder was encircled with black satin ribbon and rhinestone cording from Hobby Lobby.
We then moved that centerpiece to the food table for the reception. (Reception food consisted of heavy hors d'oeuvres from Mad Platter catering--they were great and did the catering for the rehearsal dinner as well.) The rehearsal dinner was hosted by Jonathan's parents, but was held at Bryan & Erika White's home in Brentwood--their back patio was covered with a white tent and we had a great time enjoying the fellowship and dinner!!
Note: Since we were using the same venue (major cost-cutter!) we reserved a beautiful white tent for outside the church (in case of rain) that the guests were invited to move to while the room was converted from rows of chairs and a center aisle to staggered round tables with chairs, some bistro tables, a buffet table, the cake table, and a center dance floor. The tent had hot apple cider, coffee and water, and a great music playlist. Guests mingled while the room was converted very (amazingly) quickly.
We ordered all of the black table linens for the reception from this place. Even with the shipping, it was surprisingly more cost efficient than the local options.
Reception shots:
The cake table was placed in the center of the stage at the front of the venue where we had the altar for the ceremony. This way, we took advantage of the hanging votives as a beautiful backdrop for the cake.
Keep in mind that candlelight is incredible for lighting on photos, and it's very budget-friendly. When diffused in the background, it makes for gorgeous images!
DIY Programs -- find a beautiful special font you love online...we did, and made our monogram from it. The monogram was also projected onto the wall on both sides of the front of the church. (If you have venue challenges, make it work for YOU. One of ours was the two large white squares on the walls used for projecting the song lyrics and scriptures during the sermon on Sunday mornings. We couldn't "hide" them, so we put our monogram up there.)
The programs are two 8.5x11 pieces of paper, folded lengthwise. The outside "cover" was light cardstock, and the insert was matching "regular" (but nice weight) paper. The DIY programs were definitely the cheaper way to go, but they were fairly tedious. We only achieved the layout we wanted by using a graphics program (Corel Draw or Gimp, but any number of programs would work). It is better not to leave this to the last minute so you have the mental energy to make it perfect!
You want to set up the insert page to print like a book or a magazine. You can print both sides of your paper to give yourself 4 "pages" to fill with your program details once the paper is folded. Ours were folded lengthwise, and small black satin ribbon was tied to create the "spine" of the book and hold everything together. A scripture was on the front with the monogram. Page one was a welcome with the wedding date & time/location, and our names...page 2 was the order and content of the ceremony, page three the bridal party and page 4 contained the names of our vocalists, musicians, hostesses, and thank you's.
The cake was phenomenal!! We used a local cake baker who did weddings on the side. I know, sounds risky...but we did a tasting with her and told her what we wanted and it was SO much more budget friendly than some of the popular places around town. It was also DELICIOUS. The cake flavor was butter pecan, with swiss buttercream icing. Mmmmm!! She took my design ideas and made it work beautifully. We used real satin ribbon and real antique-look brooches (ordered from here for dirt cheap). You won't BELIEVE the cost. I was pleasantly surprised at the quality of the brooches. (Another bright side is that I get to keep them and wear them occasionally...I did for a dressy Christmas party this year.)
For a guest book, we ordered a photo book from Apple through my iPhoto utilizing our engagement session photos (by Amber Beckham, of course!) and leaving occasional blank pages. Our guests wrote messages to us...and we can keep it on the coffee table or on a shelf for years to come. It worked out great!
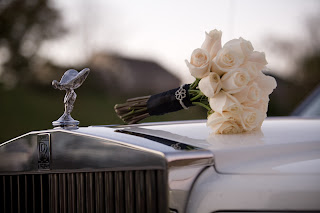
The bridesmaid bouquets were a bunch of cream roses with black satin wrapped around. Midway down the "stem" of each bouquet, I wanted some bling. For the bridal bouquet, we used the rhinestone cording. For the bridesmiads, I ran across a clearance item at JoAnn's that worked perfectly. It was actually a decorative rhinestone strap for a dress that I found in the fabric section of the store. Marked at around 80% off, it was a steal. Here are some pics (all in this post are by the freakishly talented Amber Beckham):
The picture on the left above shows the monogram projected on the wall as discussed. We had matching chest-height iron candle holders borrowed from Erika White that were on either side of the entrance to the church with H monograms on the "candles" (flameless from Hobby Lobby).
This picture (when you click and open it) will show you some of the crystal detail in the bouquet. There were hair "picks" from Hobby Lobby in the wedding section (bought when running the 50% off sale) and inserted in between the flowers.
I just posted this one because it's a beautiful example of Amber's detail work. This was before the stems were cut for me to carry the bouquet.
This one shows the detail of the dress strap used as decor around the bouquets. There were different designs...most were rhinestone flowers as pictured above.
For two of my sisters, I used stars. "Superstars." You can see them in this pic:
Biggest budget advice for a DIY wedding (or any wedding) -- PRIORITIZE. Pick the most important thing to you and your fiance that is worth spending money on......
In my opinion, what lasts and will be something to always remind you of the beauty of your day are the PHOTOS. Hire a great photographer and understand the value of spending on it. Hiring Amber Beckham was probably the best decision I made in regards to my wedding budget. When you hire a gifted photographer who captures your wedding day and the moments between you and your friends and family in a beautiful way, you will always have those memories to display as art in your home. Food and flowers and elaborate decorations are noticed in moment and then forgotten......
Amber featured some photos from our wedding on her blog. Check out her post here.
Most of all, ENJOY your day and the love that it celebrates. Weddings are about you and your spouse and the life you're building together, not an "event" that is over the next day.


